The next post from our Disney Food for Families Columnist, Erin Foster, focuses on one of my favorite things: cupcakes! Erin and her daughters did some experimenting to answer a question asked by a reader in a recent comment… . Here we go!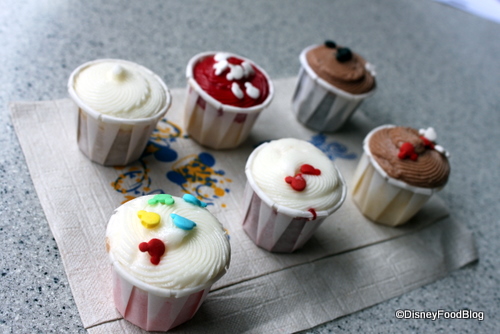
My daughters and I have been long fascinated not only with the taste of the food at Disney restaurants (yum), but also with the incredible presentation of many of the dishes — particularly the desserts. Over the years, we’ve borrowed stolen several Disney dessert presentations and adapted them for our own parties and celebrations. When we saw the recent post here about the new mini cupcakes being sold at Disney’s Hollywood Studios, we knew that this was an idea just begging to be tried at home.
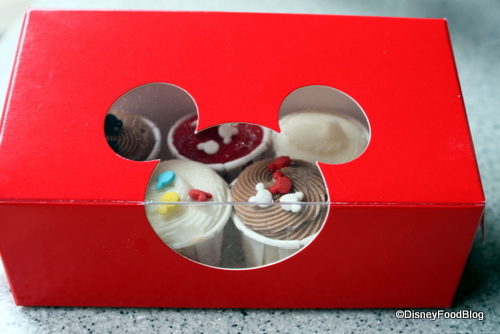
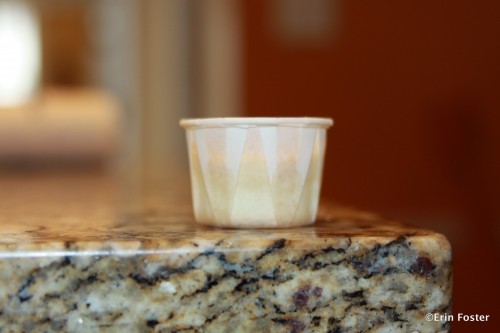
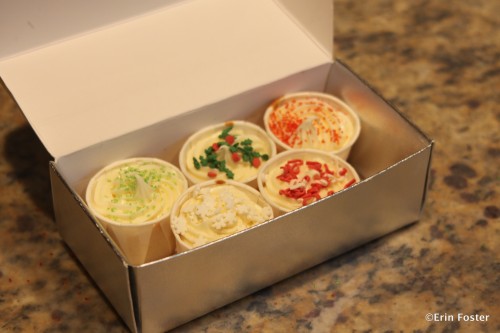
This is the Disney version of the mini cupcake; our goal was to see if we could make these as a sweet treat to bring to some upcoming holiday parties or perhaps give them as a little personal add-on to some holiday tips.
The Experiment
The most challenging part of our experiment was determining how exactly to bake the cupcakes. There was some speculation in the comments section of the original Disney Food Blog cupcakes post about what type of paper was used, whether cupcake tins were needed, etc.
After a consultation with my father, a research and development scientist in the paper and food packaging industry, I felt confident that I wouldn’t burn the house down by putting paper in the oven and decided to focus on what, to the untrained eye, seemed to be those little paper cups that you pump ketchup into at fast food restaurants. (For those of you in the know, these are the cups they use at the toppings bars at Cosmic Ray’s, Casey’s, and other WDW counter service venues.)
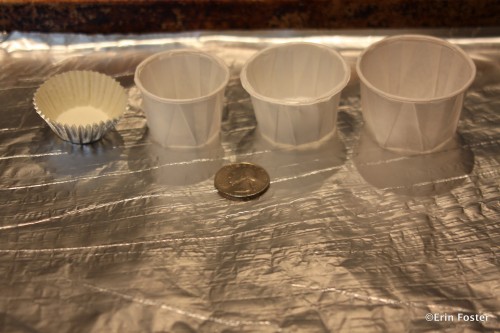
A brief online search lead me to a source for the little cups, which I now know are “Solo brand souffle portion cups.” I got mine at webrestaurantstore.com, but there may be local suppliers near you. The Solo souffle cups come in a variety of sizes. I chose to try the one ounce and two ounce versions. I also tried the Wilton brand candy and nut cups available at my local Michael’s craft store, which look nearly identical to the Solo cups, but have a shiny coating inside the cup. And we tried a traditionally-shaped mini cupcake liner.
You can get a sense of just how small these little cups are by using the quarter for reference. Left to right, the cups are the traditional liner, the one ounce Solo cup, the Wilton nut cup, and the two ounce Solo cup. They are all perfect for little one to two bite morsels.
For purposes of experimentation, the cake batter we used was plain old Duncan Hines French Vanilla from the box. Obviously you can use other flavors or your own secret family recipe, but we wanted something simple to test the baking method.
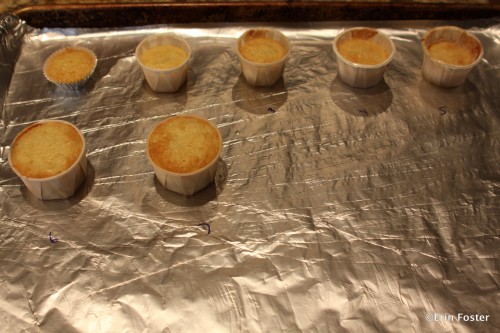
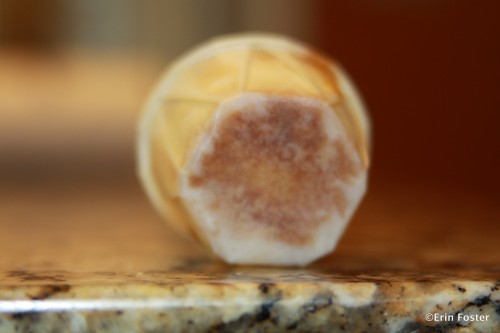
To figure out which baking medium would work best, we tried each of the cups, both plain and misted with supermarket cooking spray. We filled the traditional liner, the one ounce and the Wilton cups with exactly 1 teaspoon of batter and the two ounce cups with two teaspoons of batter. We baked them until just golden, which ended up being about 13 minutes, or slightly less than the box suggested for normally sized cupcakes
Of the variations we tried, the cutest and cleanest was the one ounce Solo cup, unsprayed. The presentation was neat and professional.
By contrast, the cups that we sprayed with cooking oil came out greasy and a bit dirty looking. Also, the cupcakes were no more difficult to remove from the unsprayed cups than they were from the sprayed ones.
The Wilton cups with the internal shiny coating worked equally as well as the regular paper cups, but they are more expensive. I also wondered about the health aspect of eating from the baked coating. There did not appear to be any plastic transfer from the cup to the food, but better safe than sorry.
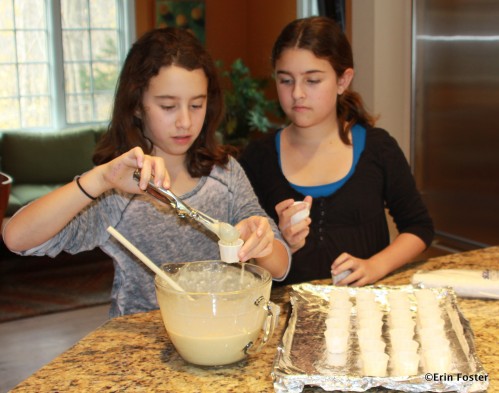
Once we figured out which type of baking method worked best, we set up an assembly line to fill the cups. My rough estimate is that you could get about 75 of these tiny cupcakes from one box of batter.
After going through a few rounds of baking, we learned that by far the best looking cupcakes were the ones in which we had absolutely no batter touch the inner sides of the cups. Precise filling made for a much more photogenic finished product. We ended up using a tiny ice cream scoop to help with batter transfer.
The Results
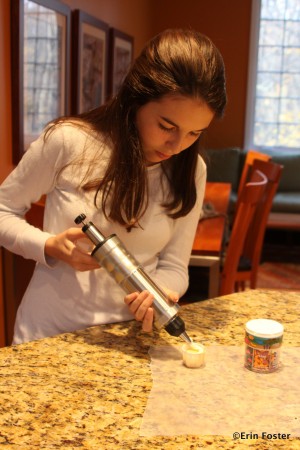
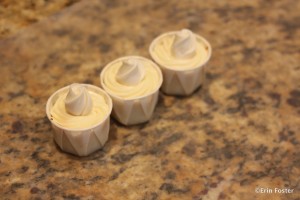
Once the baked cakes cooled, we got to the fun part — decorating. We initially tried spreading on the icing with a knife. This was a serviceable option, but the cupcake didn’t quite get the slick look or “wow factor” that the Disney cupcakes had. Then we tried using a Wilton Dessert Decorator, this was super easy and made masterful Disney-looking swirls. I’m sure that anyone who is talented with a pastry bag could achieve similar results with that.
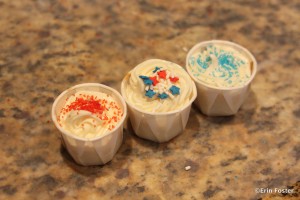
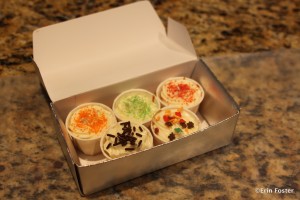
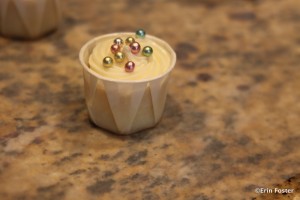
Once you have the frosted cupcake base, you can obviously embellish these bite-sized treats to fit any occasion you might have at home. Here are some of the suggestions:
Our experiment in recreating Disney’s fabulous treat idea at home was a smashing success. We’ll be bringing trays of these not-too-sinful treats to our holiday visits this year. They really are just one wonderful bite each. Bon appetite! (And thanks for the idea, Mickey.)



















 Our handy (and portable!) ebook guides make sure you get the best deals and can plan a vacation of a lifetime.

Love the idea and looks like your girls enjoyed making it. Thanks for the info Erin!
” After going through a few rounds of baking, we learned that by far the best looking cupcakes were the ones in which we had absolutely no batter touch the inner sides of the cups. ”
How do you not have batter touching the inner sides of the cups? Please explain.
Matt – Thanks!
Amanda – My writing was obviously not clear here. So sorry. Yes, of course the batter has to touch the inside of the cup on the bottom. What I meant was that the cupcakes came out better when there were no drips or smudges of batter on the unfilled top portion of the inner cup. Keep all the batter directly in the bottom half of the cup, with no batter inside the top half, and you’ll be fine. Again, sorry for the confusion.
Erin – What a great job! I had a question though, were you able to get the cupcakes out of the paper cups easily? It looks like you might have to tear them.
Louise – In the interest of science (:-)), we tried a few different ways of eating the cupcakes. The easiest is to dig in with a fork as shown in the original mini cupcake post. With a fork, they came out super easy. You can also eat them “shooter style” by squeezing them directly into your mouth. Messy, but very satisfying. To eat them like a regular cupcake, yes, you do have to make a tear in the paper. Since the top part of the Solo cups are stiff, a tiny tear is necessary to get the peeling started. Once you have a tiny tear, the cupcake pops out quite easily even when the paper cups are not sprayed with any oil.
I also tried this when I sw the ones from WDW. I made them for my co-workers at Halloween. I used the Wilton un-coated, filled them half full with a squeeze bottle and found that 13 minutes was also ideal. Now I’m hooked for every occasion!
VERY cool! We’ll be trying this.
I’m surprised that the cupcakes didn’t rise more based on where you had the batter. Did you try bigger amounts to get more of a crown on it? (Do the Disney mini-cupcakes go to the top of the paper, or is that just built up with frosting?)
John – We did fill some of the cups with more batter and did get a higher crown. I happened to enjoy the appearance of the fully-contained cupcake, but you can alter this to suit your own personal preference. It’s easy enough to play around with the look you like best just by trying a few different fill levels. The Disney version has the cake below the rim of the paper and the little bit of a crown is all frosting. Again, if you prefer a different cake/frosting ratio, just experiment to find the look you like best.
Love the idea! I think this is a great gift for neighbors and others that you want to give a little something special to. Thanks for sharing 🙂
Lydia – The squeeze bottle is a great idea. Would make precise filling super easy. I’m going to use this method next time.
Angel – Thanks!
Great post, I was mesmerized! Thinking of using this idea for my “those who serve us” gifts instead of cookies. I have tons of cake mixes so it will be nice to use them up in this way!
What a great experiment! Thanks for sharing. They turned out fantastic!
I’m so penciling it in to make these with my girls, as soon as I have time. Right now, the pencil indicates that will be around July, 2014 😉 I may have to bump something less crucial – like dental work, grocery shopping, education, and perhaps even bathing. I’m willing to make the sacrifice 😉
This is such a fabulous idea – and I’ve got so many holiday parties coming up to supply treats for. I love to bake, but the commitments at this time of year tends to overwhelm me. Being able to make something like this, with its connection to Disney, makes things much more fun!
And Lydia, thanks for the squeeze bottle suggestion!
Great Job Erin! I love your use of trial and error to eventually get to the final subject.
As for the frosting, I think it would just take one of those pastry bags and a special cap to get the exact amount of frosting on it. They usually have some pretty neat patterns on them as well.
Now if you could only get your hands on some Mickey sprinkles…
Yay! Someone figured out how to make these!
Just a note: you can get those solo cups at most party supply stores!
I made these as april fools day “gags” for my kids lunch by mixing white frosting with food coloring to resemble mayo, mustard, and catsup..I served them with “matloaf cupcakes and mashed potato frostng”